Setup Guide
Creating a Pipedrive App
To get started, you’ll need to create an app in the Developer Hub of a Pipedrive account.- Sign up for a free Pipedrive developer sandbox here.
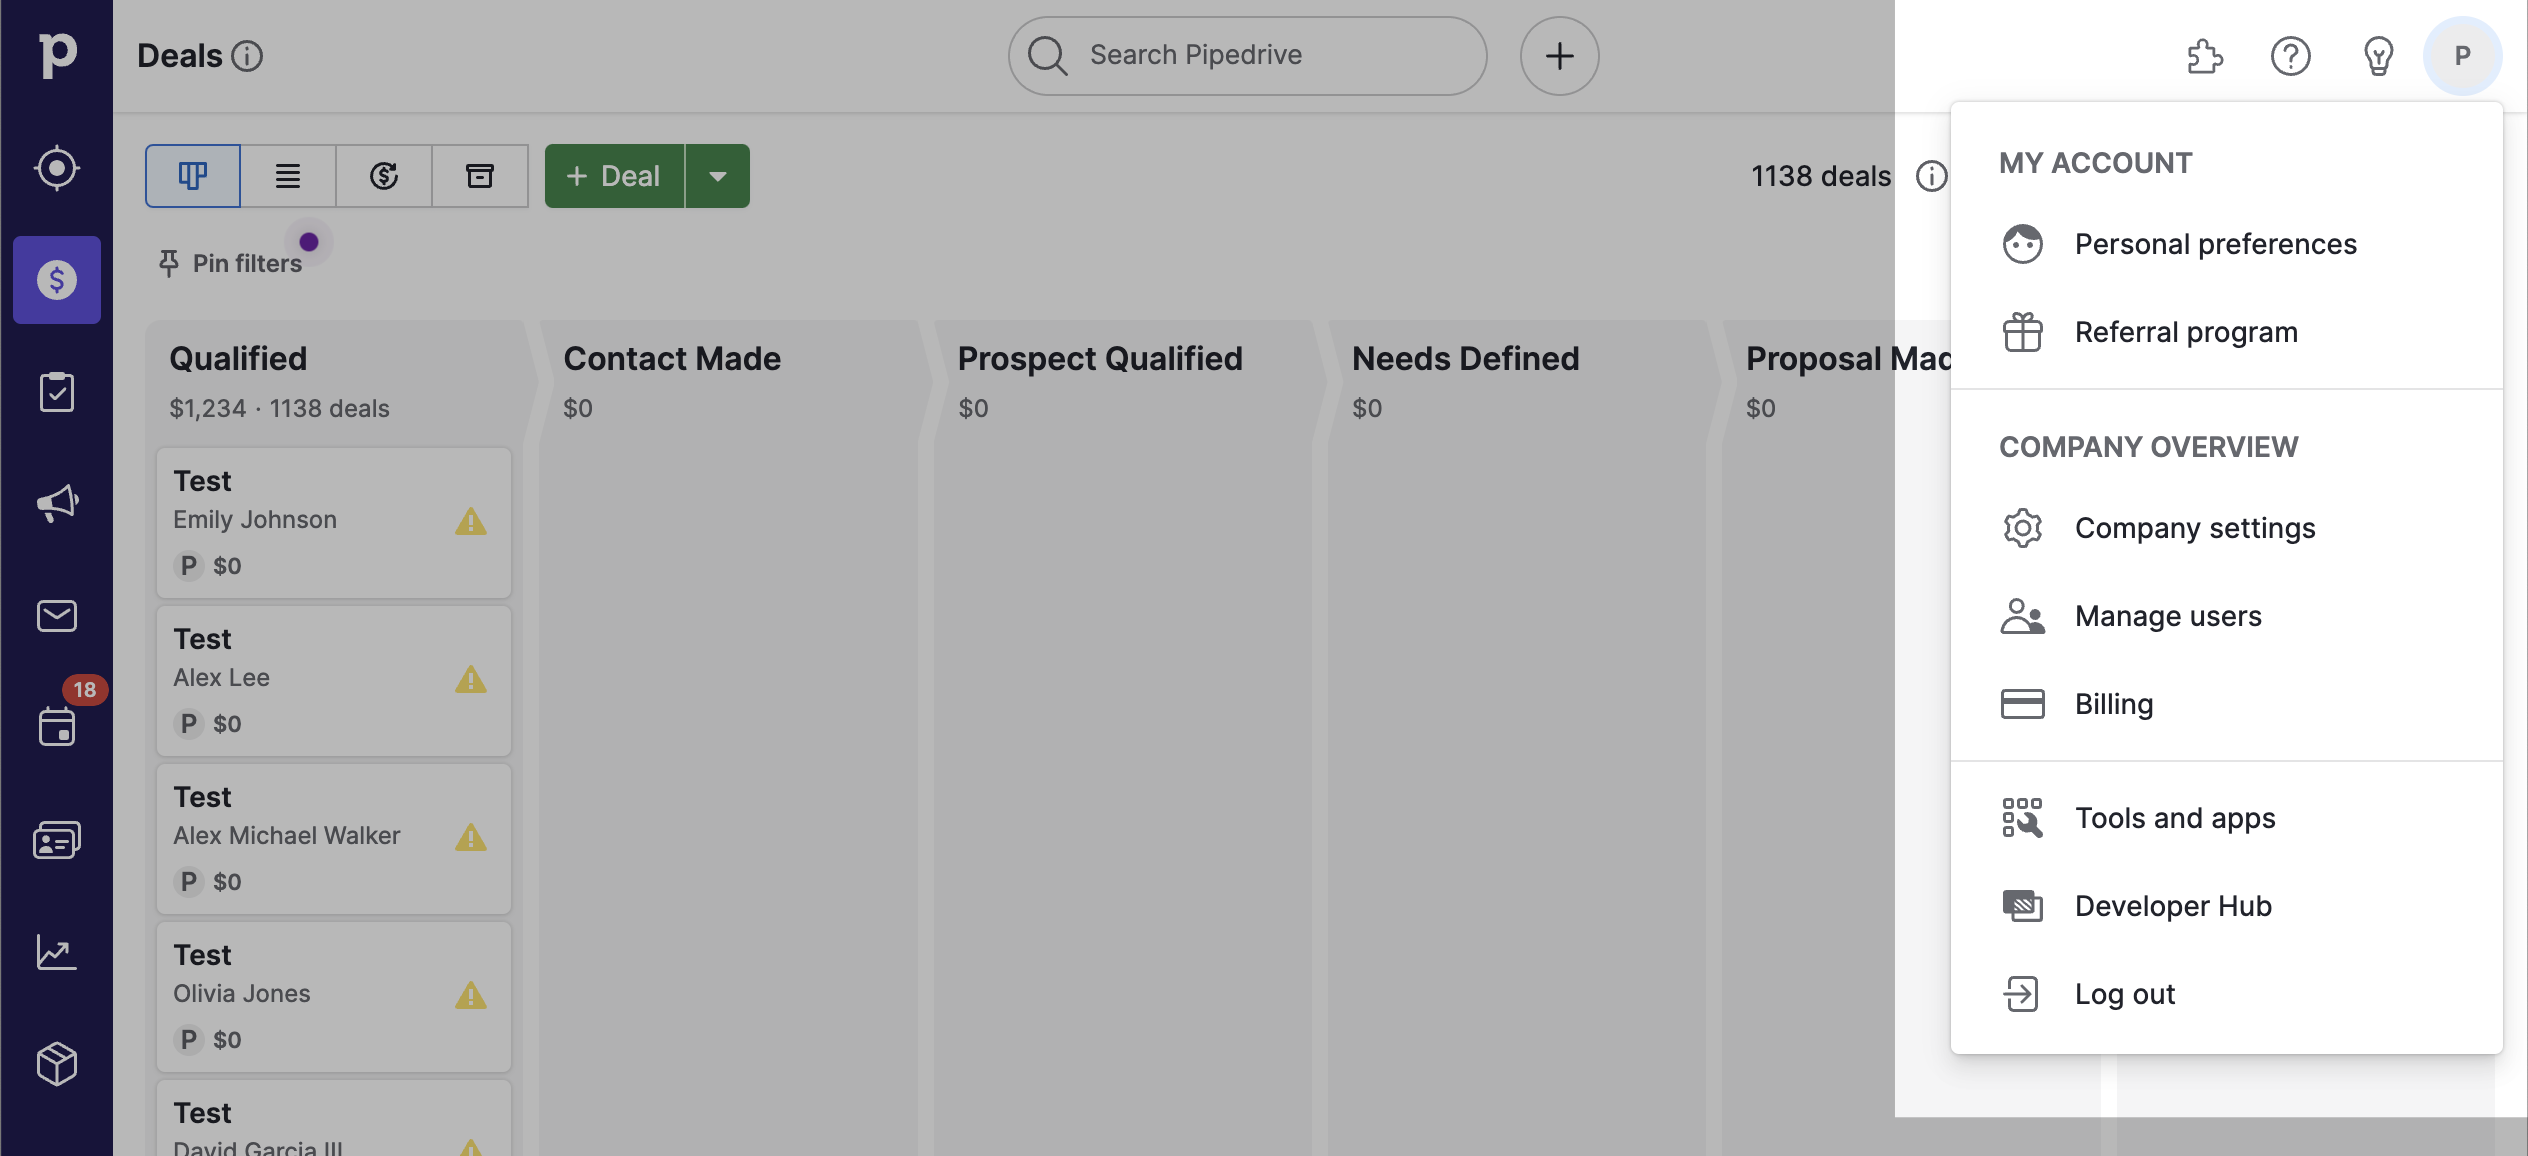
- Click the Profile Icon in the top right and select Developer Hub:
- Click Create an app and select Create public app. Public apps are intended to allow your users to connect their Pipedrive accounts to your app.
- Name the app and add https://passport.useparagon.com/oauth as the Callback URL. Click Save.
- Configure your app to use the least privileged scopes required for it to function.
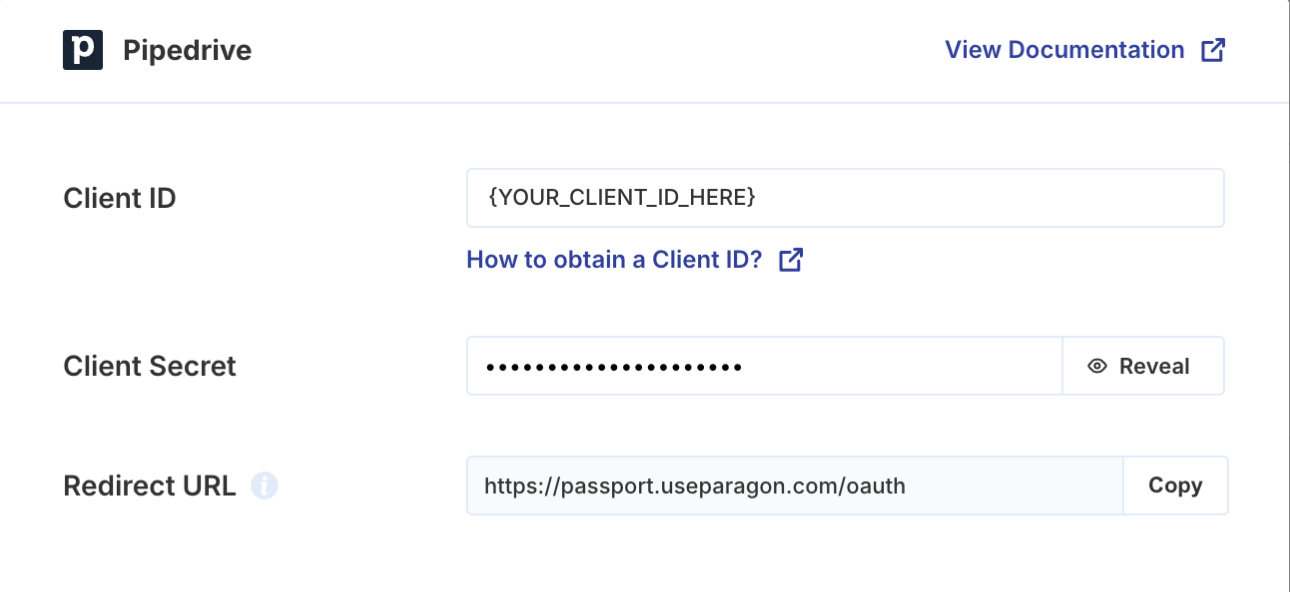
- Copy the following information to set up your Pipedrive app with Paragon.
- Client ID
- Client Secret
Add your Pipedrive App to Paragon
Complete configuration within the Paragon Dashboard and test authentication for your integration.- Select Pipedrive from the Integrations Catalog.
-
Under Integrations > Connected Integrations > Pipedrive > Configure, fill out your OAuth client credentials from the end of Step 1:
- Client ID
- Client Secret
Note: Leaving the Client ID and Client Secret blank will use Paragon development keys for user authentication. This is intended for development use only.
Connecting to Pipedrive
Once your users have connected their Pipedrive account, you can use the Paragon SDK to access the Pipedrive API on behalf of connected users. See the Pipedrive REST API documentation for their full API reference. Any Pipedrive API endpoints can be accessed with the Paragon SDK as shown in this example.Building Pipedrive Workflows
Once your Pipedrive account is connected, you can add steps to perform the following actions:- Create Record
- Update Record
- Get Record by ID
- Get Records
- Delete Record
{{ to invoke the variable menu.
Using Webhook Triggers
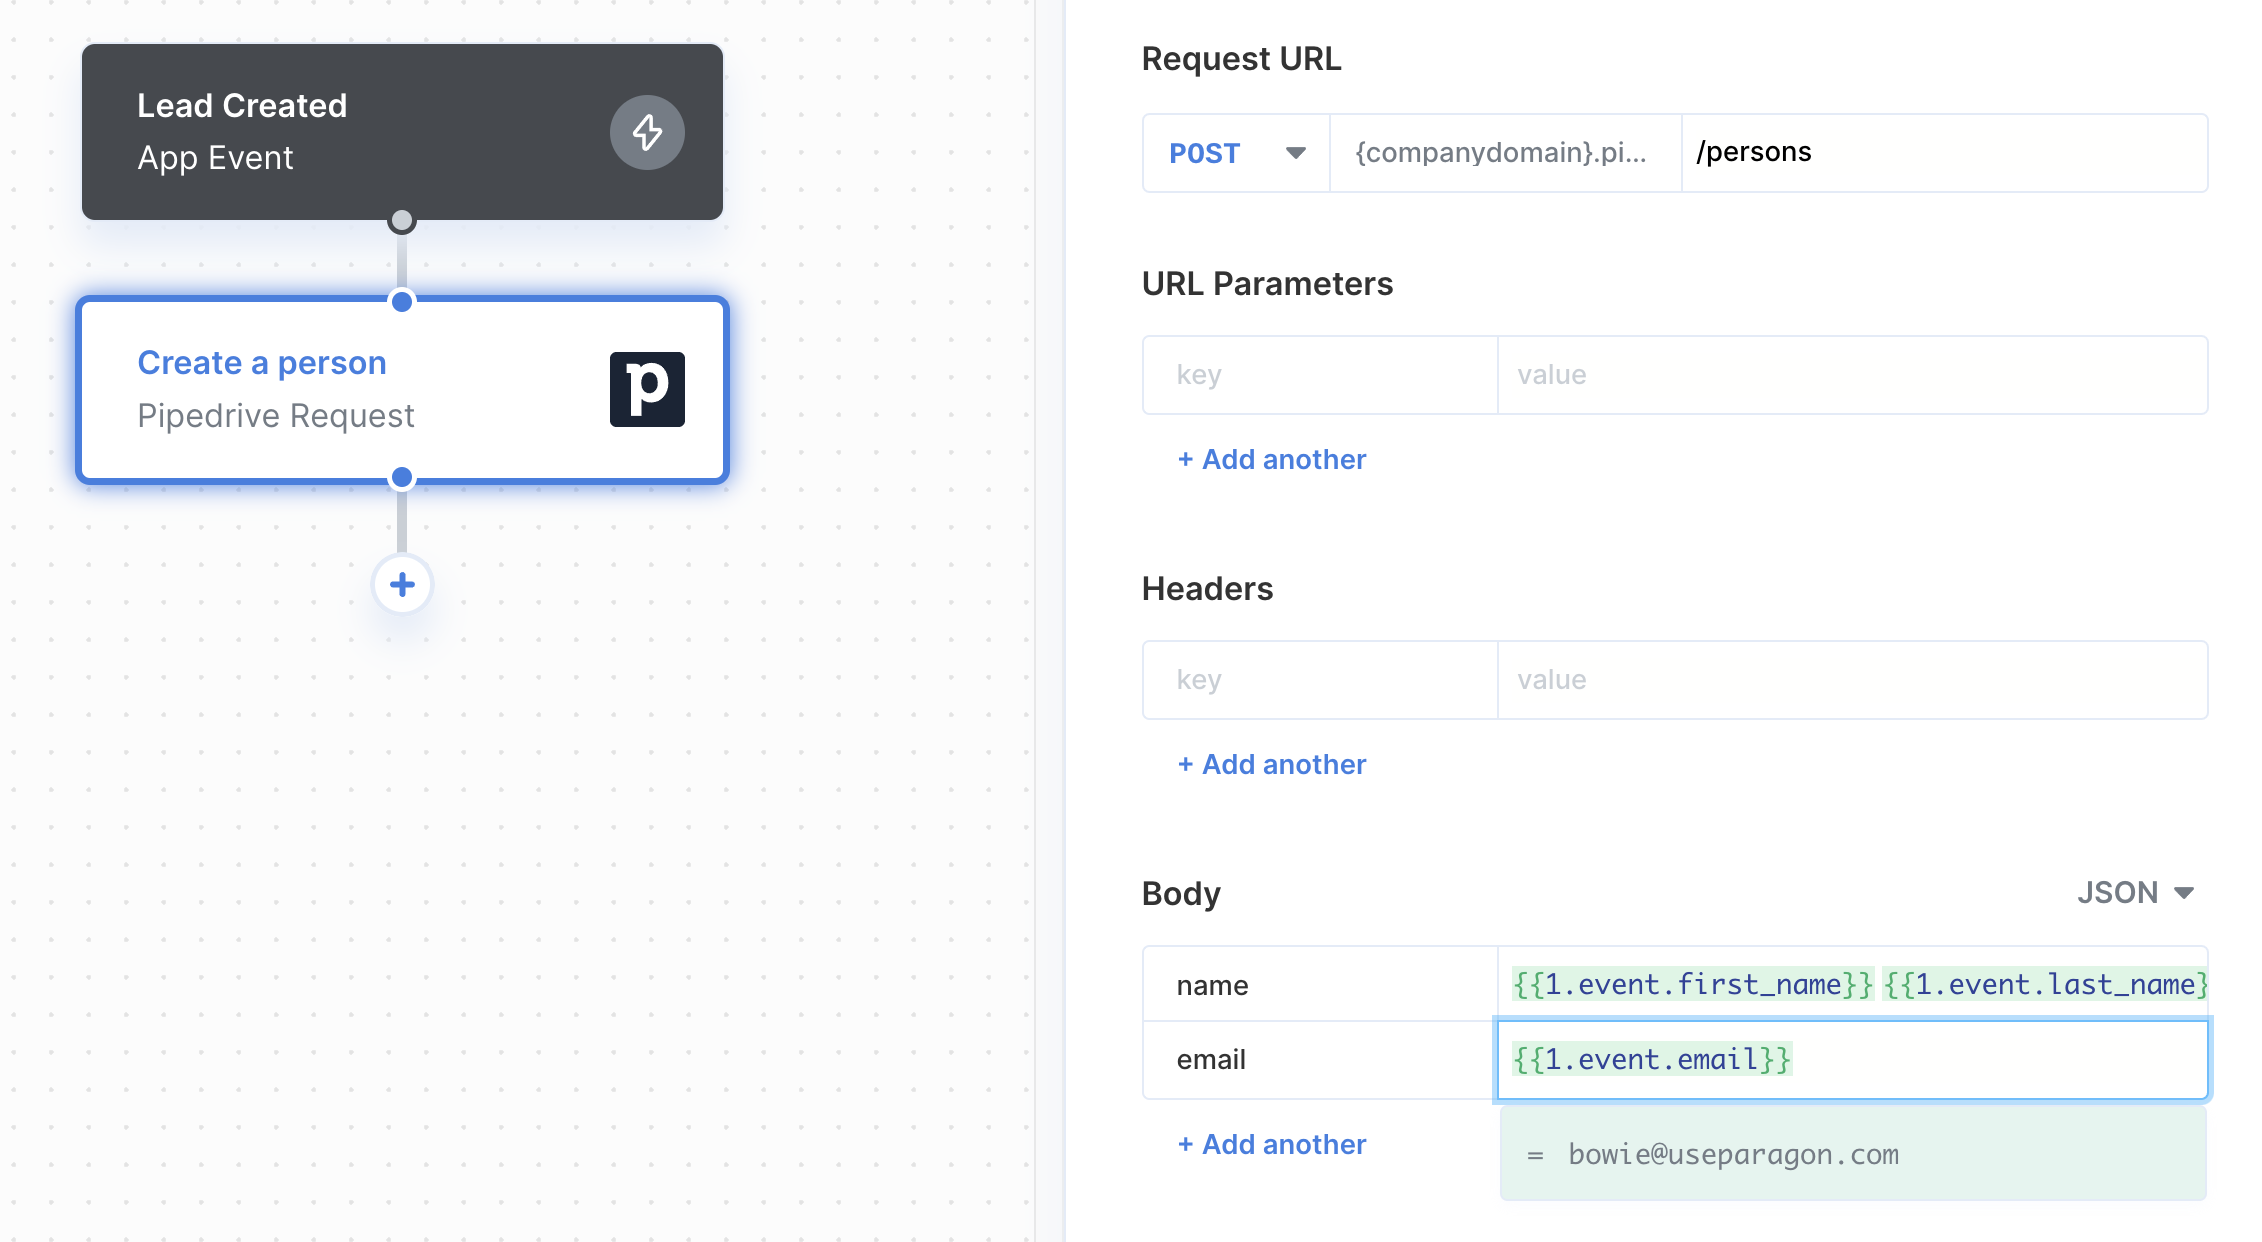
Webhook triggers can be used to run workflows based on events in your users’ Pipedrive account. For example, you might want to trigger a workflow whenever new leads are created in Pipedrive to sync your users’ Pipedrive leads to your application in real-time. To use Pipedrive’s webhook triggers, you’ll need to enable the “Administer account” scope in your Pipedrive application:- Log in to the Pipedrive Developer Portal.
- Navigate to Tools > Marketplace manager and select your application.
- Under OAuth & Access scopes, enable Administer account.
- Record Created
- Record Updated
- Lead Created
Publishing your Pipedrive app
Setting up a Redirect Page in your App
Your Pipedrive integration requires a Redirect Page hosted in your application to support an installation flow that begins in the Pipedrive Marketplace (i.e., a user searches the Pipedrive Marketplace for your published app and clicks Install). For an example implementation of the Redirect Page using React (based on our Next.js sample app), see here. The Redirect Page should be implemented as follows:-
Import the Paragon SDK and authenticate a user.
- Note: If a user is not yet logged into your app, Pipedrive’s requirements suggest that you redirect to a login form, while preserving the intended URL to redirect to upon successful login. In other words, after logging in, your user should see your Redirect Page.
-
Accept and read query parameters, which will be:
-
codein case of a successful installation -
errorin case of an unsuccessful installation or denied consent
-
-
If the
codequery parameter is present,- Call
paragon.completeInstallto complete the OAuth exchange and save a new connected Pipedrive account.
- Call
-
If the
errorquery parameter is present,- Show this error in your app and allow your user to retry the process.
Updating the Allowed Redirect URL
If you were previously testing withhttps://passport.useparagon.com/oauth as your Pipedrive Redirect URL, you will need to update this value after implementing a Redirect Page:
- Log into your Pipedrive Developer Portal.
- Navigate to Tools > Marketplace manager and select your application.
- Under OAuth & Access scopes > Callback URL, provide the URL of your Redirect Page.